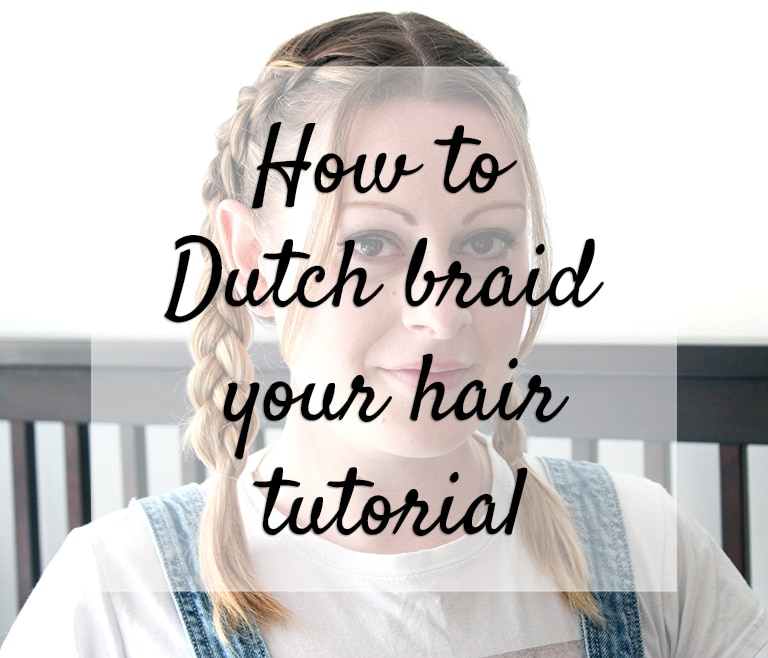
A few months ago I was off sick for a couple of weeks with vertigo. I got really bored as I couldn’t really do a huge amount, so I thought it was about time to learn a new skill. I took to YouTube to finally learn how to Dutch Braid my hair 🙂
Now I’ve got the basic style down (you know, the cute little two braids), I thought I’d share how I do it as a few people asked me on Twitter 🙂
This isn’t exactly going to be easy without a video, but I’m always up for a challenge and hopefully the photos will make sense 😀
- Part your hair – this step is fairly easy, just part your hair where it feels natural. Although I usually have a side parting if I wear my hair down, I always do a centre parting for braids, plaits and space buns. I try and get the back as straight as possible, but don’t worry too much. If you’re an expert, you can always do a crazy zig-zag parting 🙂
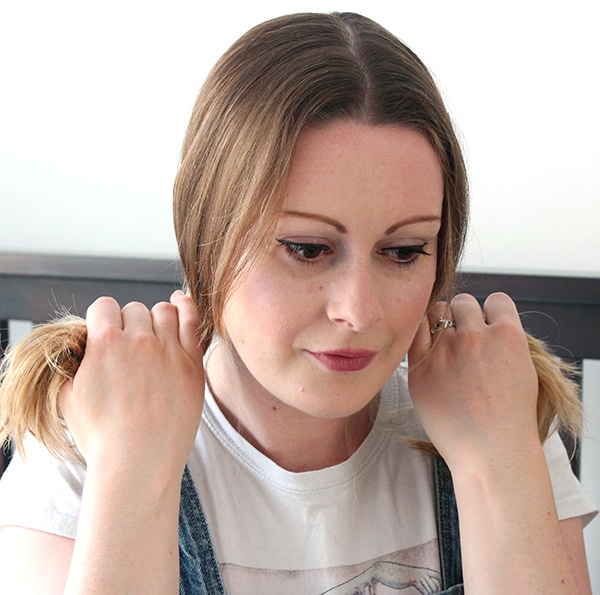
- Clip or tie one side out of the way – This will stop you getting any hairs from the wrong side caught up in your braids. I also clip a small section at the front to the other side so it can look all cute and wispy later.

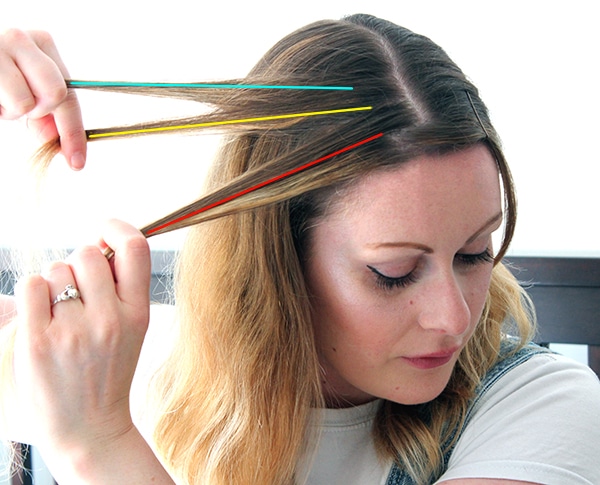
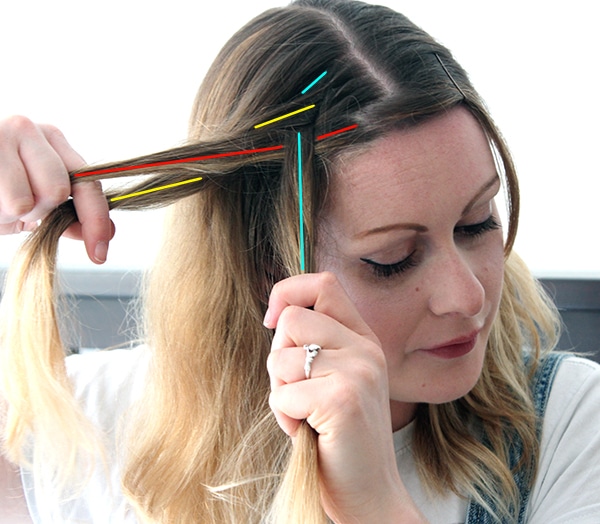
- Getting started – You need to grab a section of hair to start braiding. The easiest way I learnt was to take an almost triangle shaped section of hair to start with and make sure you’re holding so it’s at a backwards angle.

- Split it up – Split the triangle of hair into three even sections. I’ve colour-coded them to make it easier to follow (I hope)!!
- It’s time to braid (the Dutch way) – The start of a Dutch braid is like doing a normal plait, except for one difference, instead of swapping the front and back sections over the middle, you swap them under the middle. I personally always start with the back section (the blue bit) because I find it easier. Swap the back section of you hair underneath the middle section (the yellow bit).
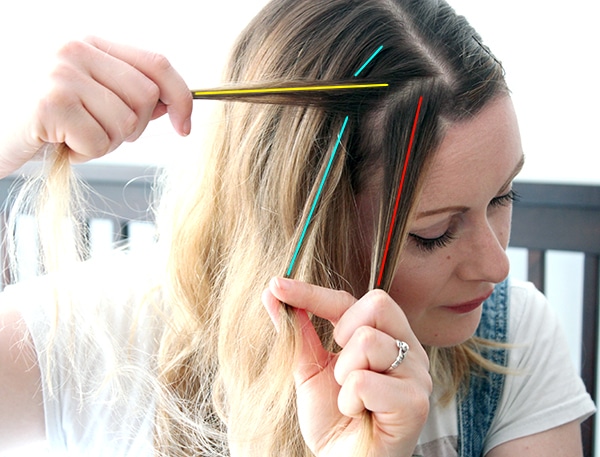
Now swap the front section (the red bit) under the new middle section (the blue bit).
- The first bit of proper braiding – Now comes the part that takes the most concentration! You’re going swap the back section (the yellow bit) underneath the middle section (the red bit) again, but before you do, you need to pick up a section of loose hair (the yellow dashed bit) and add it to the back section. Try to pick some that’s right next to or underneath the back section to keep it looking neat. Once you’ve got your new back section, swap it underneath the middle section (the red bit).
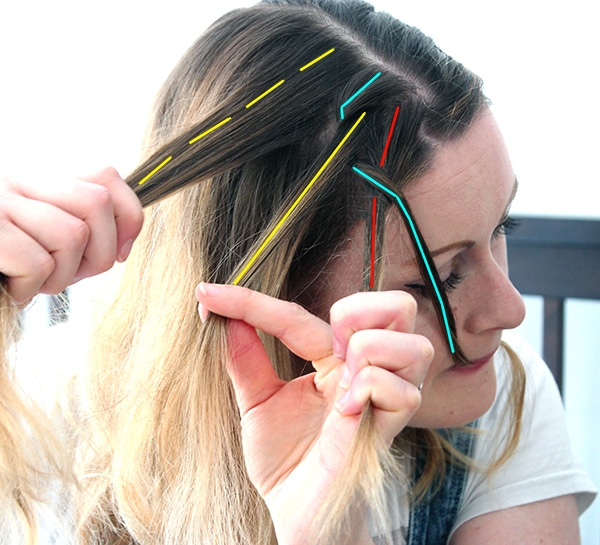
- Finishing the braid – Now just keep going; add some hair to the front section, swap it underneath with the middle section, add some hair to the back section and swap it underneath the middle section until you’ve picked up all the hair. Once you’ve picked up all the hair, carry on braiding it until the end and put a tie round it. Congratulations, you’ve just hopefully made a Dutch Braid.

- Unclip the front – Now you’ve finished one side, you can unclip the cute wispy bit you put aside earlier (if you did) and start braiding the other side!

I think it took me about 30 minutes the first time as I was doing it really slowly, but now it usually takes about 10 minutes to do 🙂

Top tips:
- Brush your hair before you start.
- Have your hairbands ready next to you before you start braiding!
- Keep an eye on the direction you’re holding your hair, because if you’re holding it too far forward, you could end up braiding over your ears. I’ve done that a few times!
- I also find that holding the front section in my mouth out of the way, until it’s time to use it, makes things a lot less complicated. Grim but true, come on, we’ve all done it, right? 😀
- Dry hair is a lot easier to Dutch braid than wet hair!!
Are you good at braiding your hair? If not, are you now tempted to try out this tutorial? Let me know in the comments below 🙂 x


5 Comments
Tempted to try this but I think it will take me a while to learn! It certainly makes sense. My hair is all different lengths and this could either hinder the braids or help me grow it out 😊
Just make sure you have plenty of time and a mirror to help you 🙂 My hair is all different lengths too and most of the time it’s not noticable 🙂
Thanks for this! I’ve watched so many videos trying to learn how to braid my own hair, but I end up just getting confused as the videos always have hands in the way or don’t explain it properly – but colour coded pictures are much easier to follow! I’m currently growing out a pixie cut, so I don’t think I’ll be able to get much of a braid in but I’ll certainly be practicing the technique!
I really hope it helps for when your hair’s long enough!! Let me know how it goes 🙂